


Installation instructions
Installation of interior mouldings
|
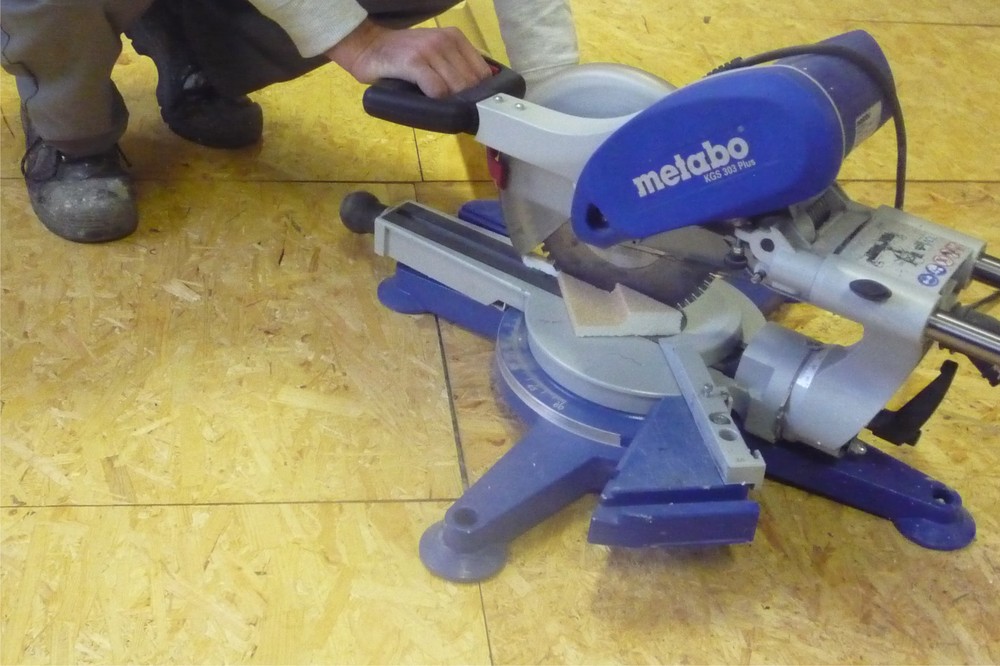
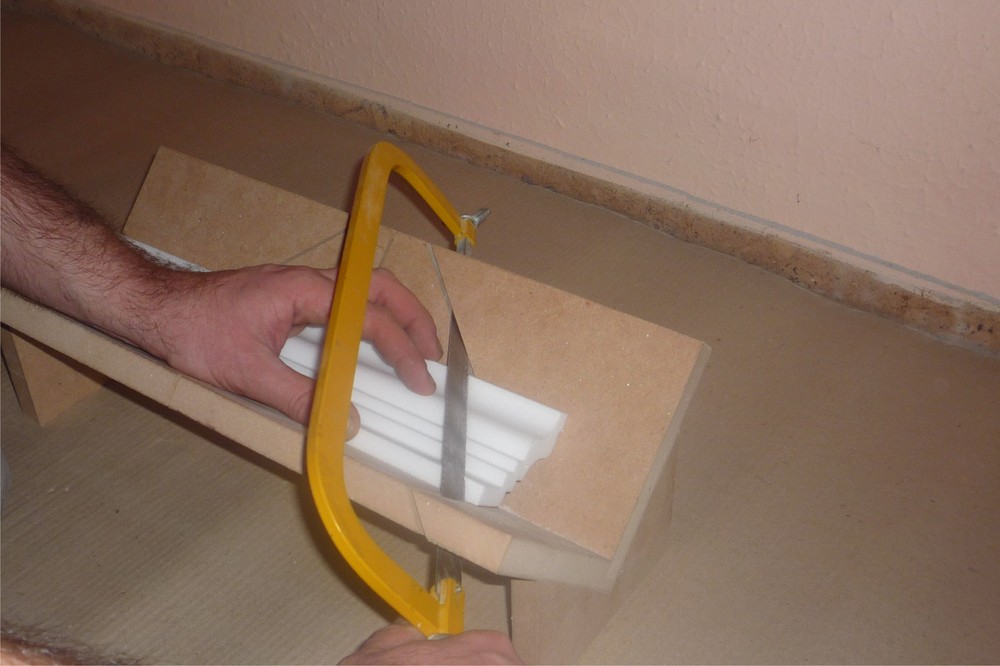
1. Cut the moulding on a 45 degree |
|
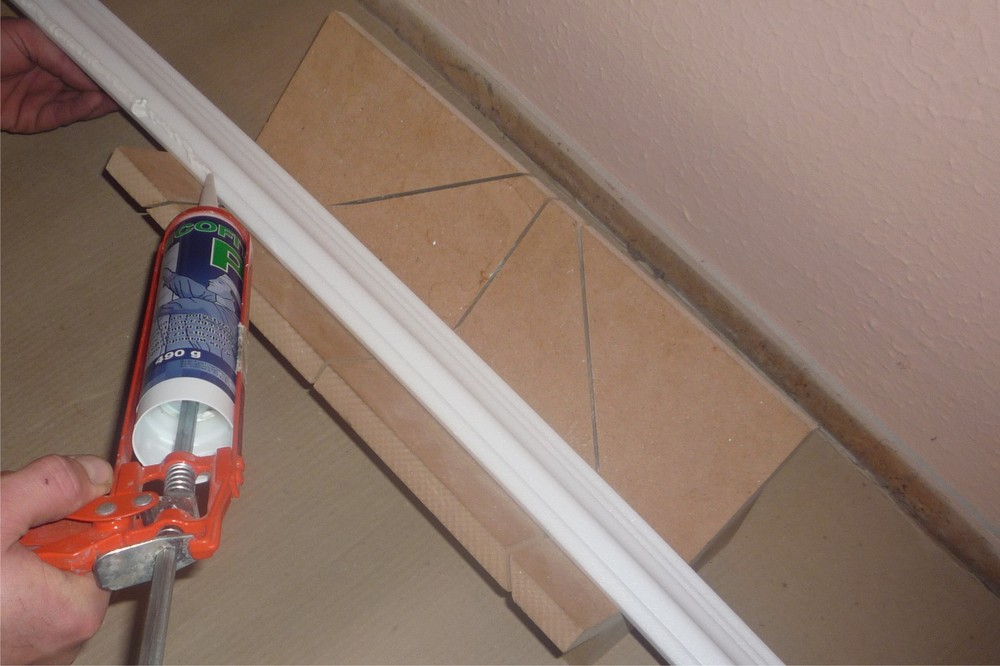
2. Apply the adhesive to the moulding |
|
|
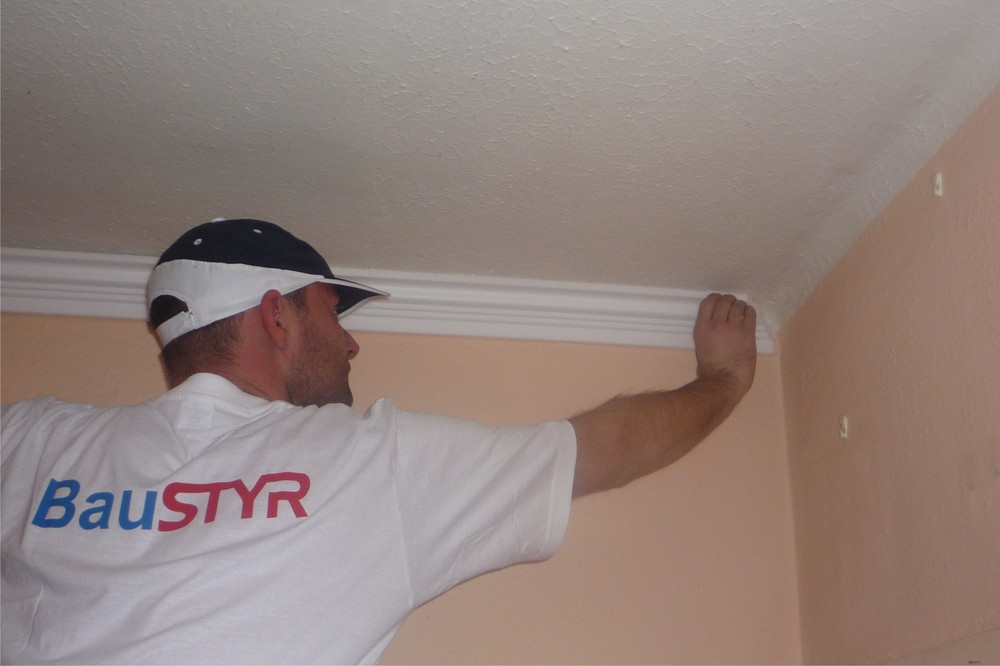
| 3. Adhere the first piece |
|
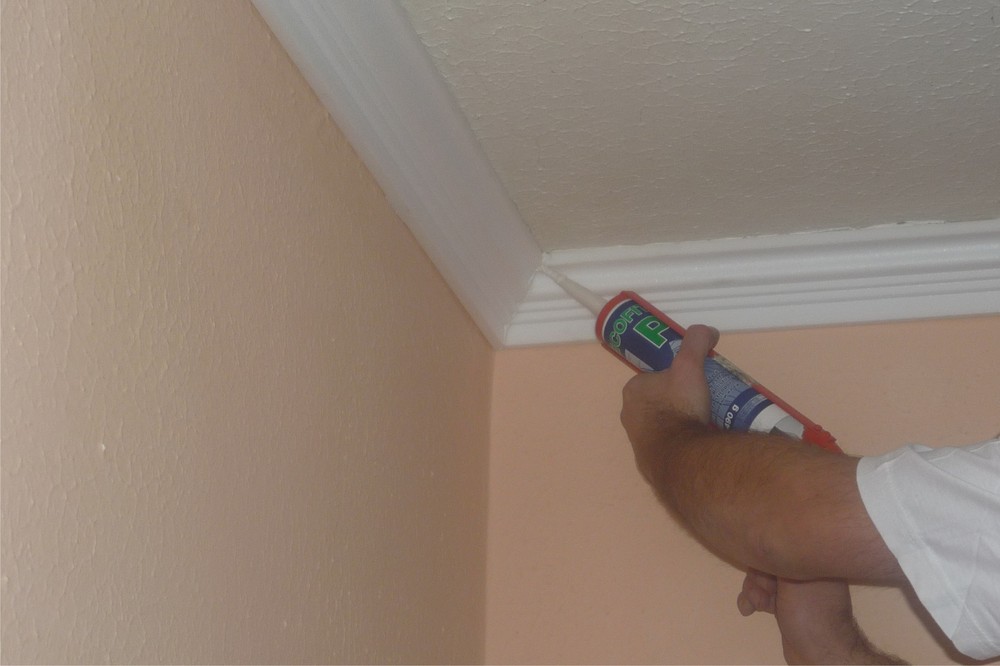
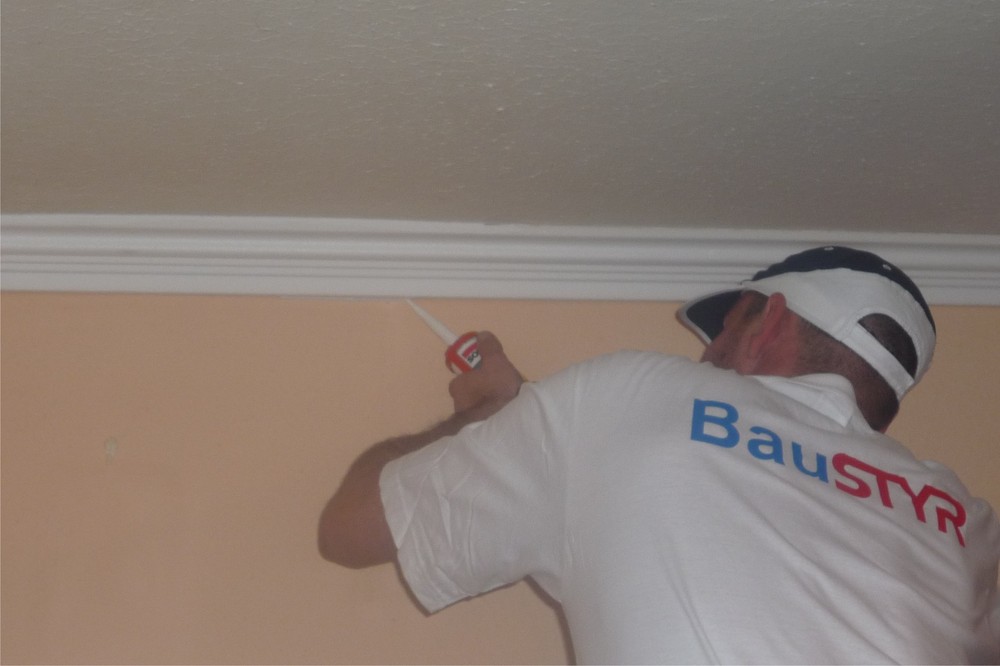
4. Apply the adhesive to the joints |
|
|
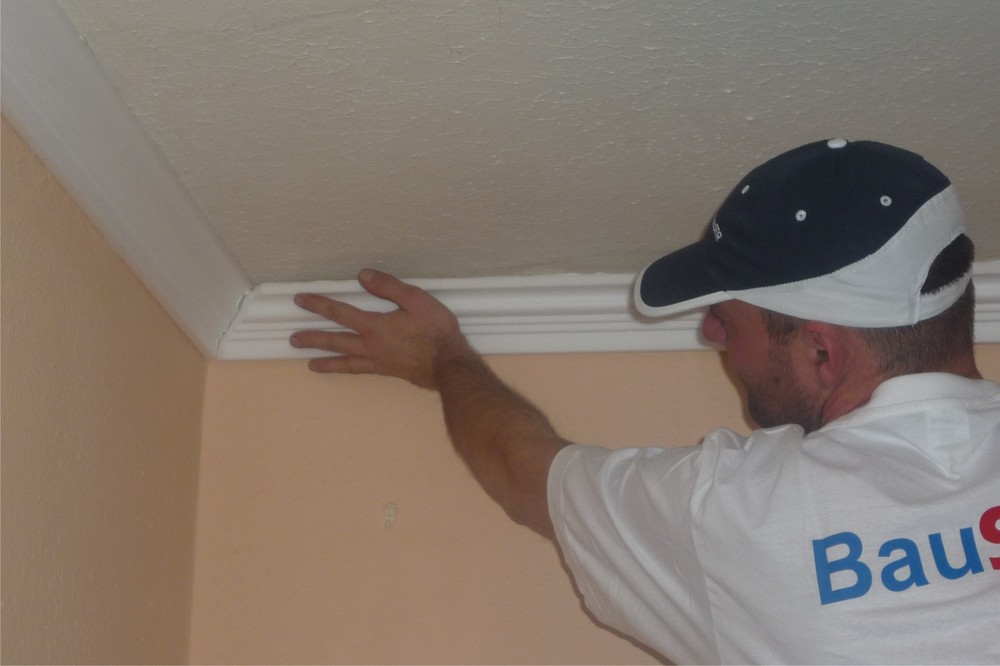
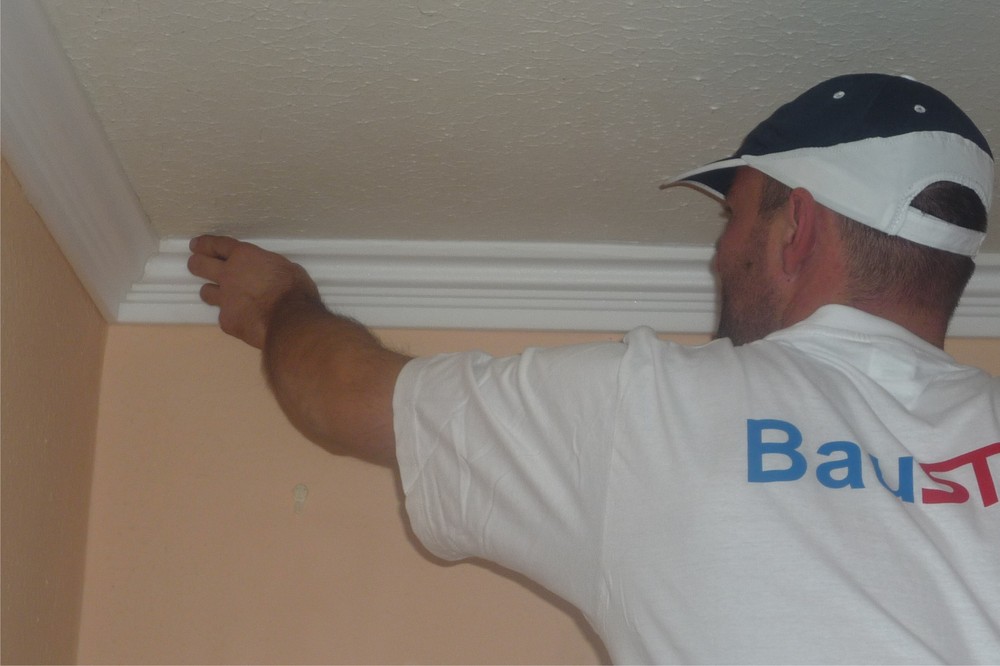
| 5. Adhere the second piece |
|
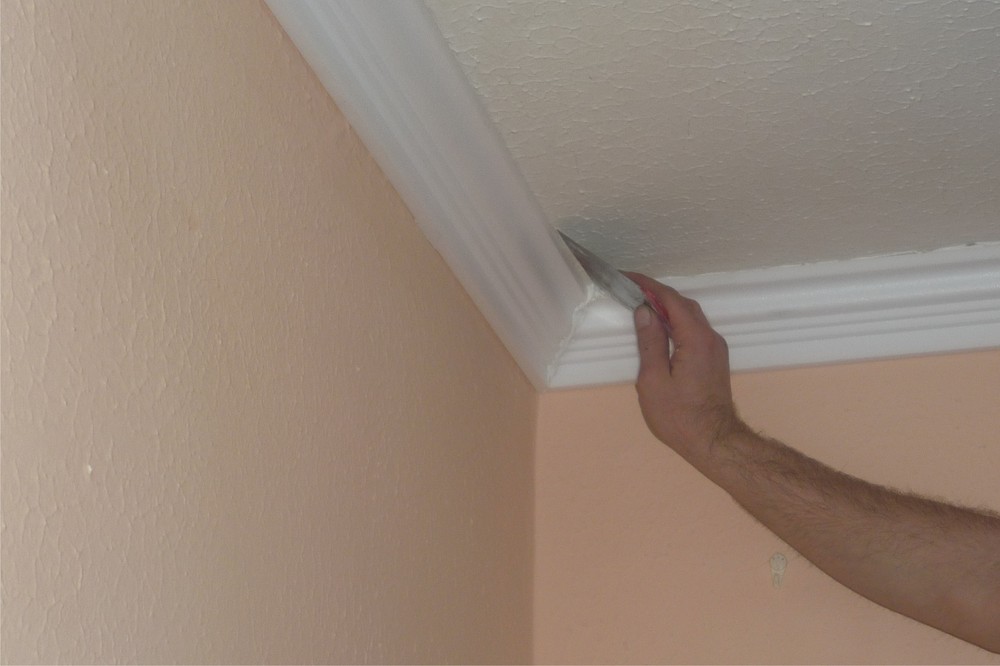
6. Apply the spackle to the joints |
|
|
| 7. Smooth and sand off the joints |
|
8. Apply the spackle to the potential rifts |
|
|
| 9. Remove any spackle glue residue |
|
10. Paint with acrylic paints |
|


Installation of exterior mouldings
| 1. Cut the moulding on a 45 degree angle |
|
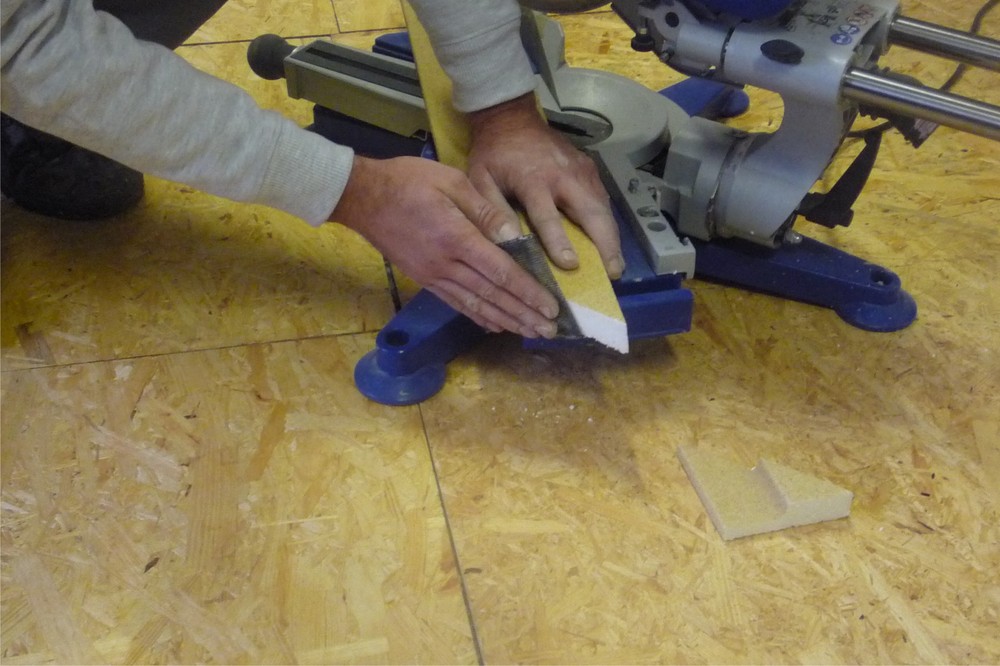
2. Proces the ends of the mouldings |
|
|
|
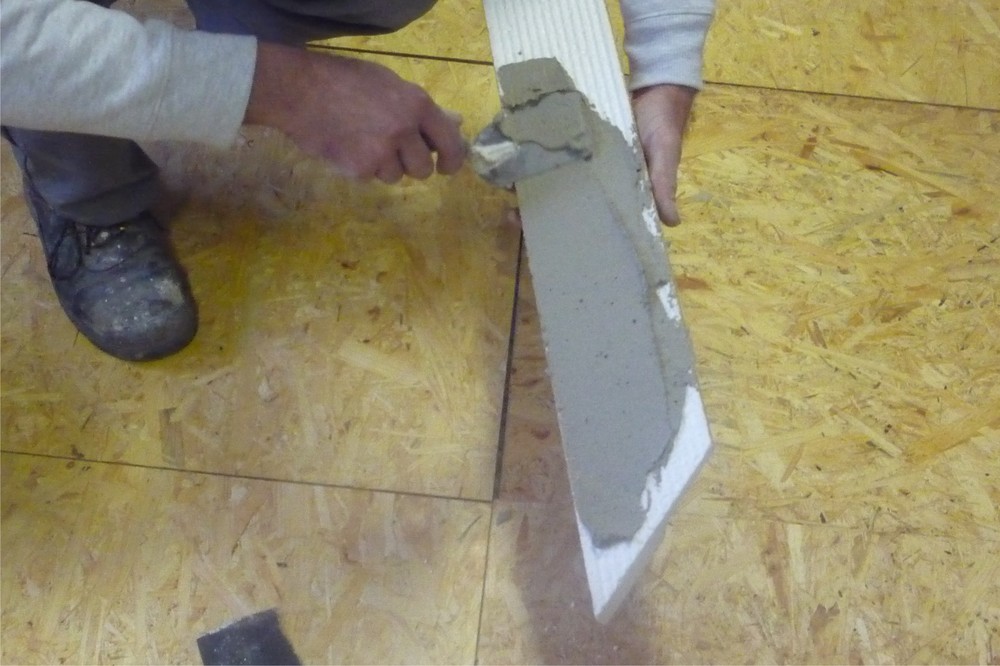
3. Apply flexible adhesive to |
|
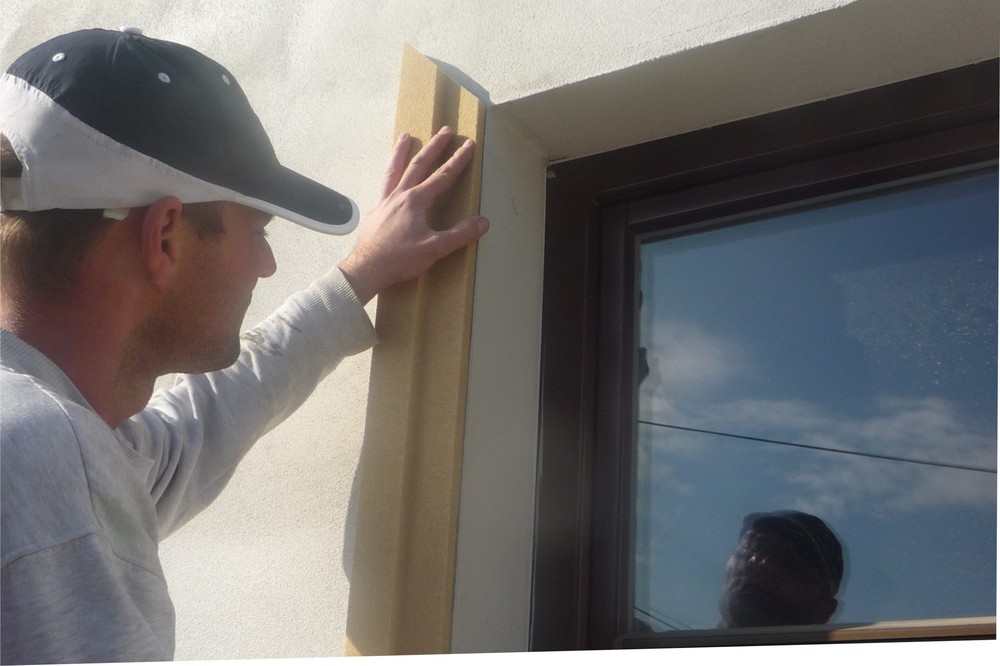
4. Adhere the moulding to the facade |
|
|
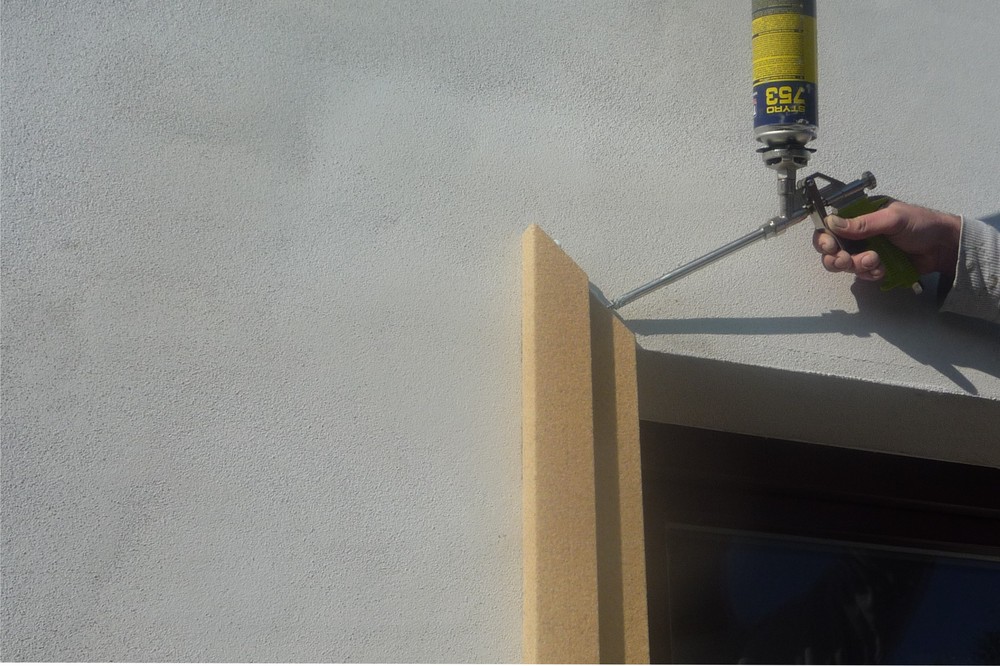
| 5. We use PU foam glue on the joints |
|
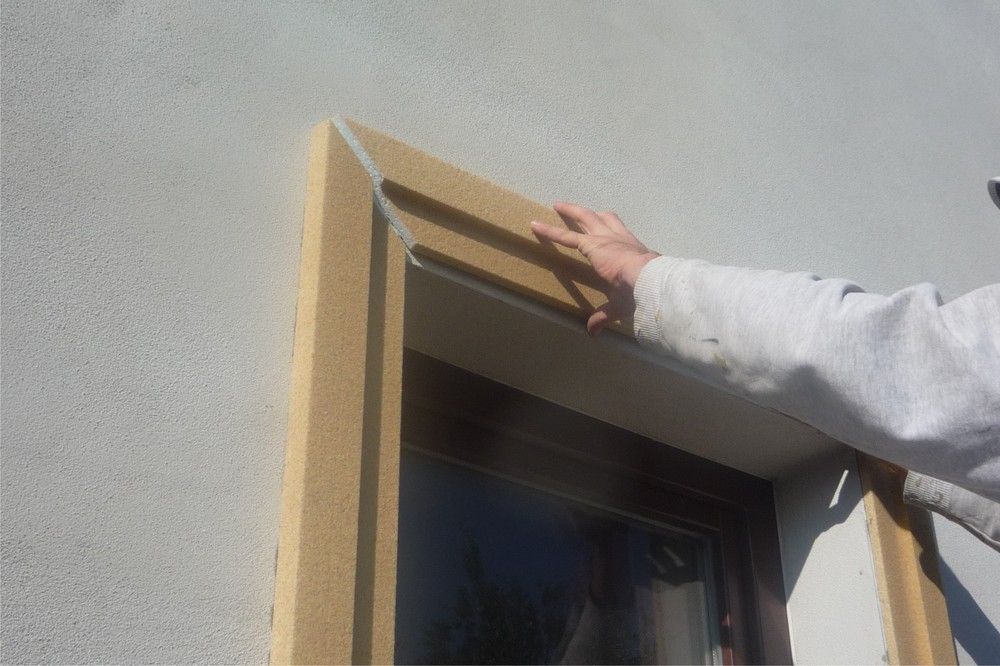
6. Place the counterpart |
|
|
|
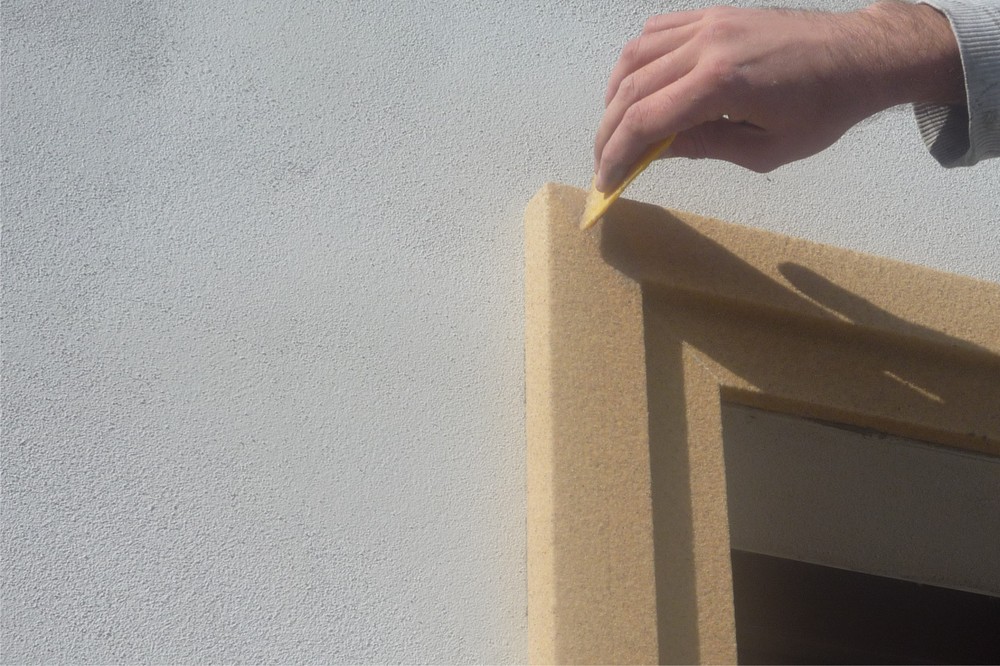
7. Apply the abrasive to the |
|
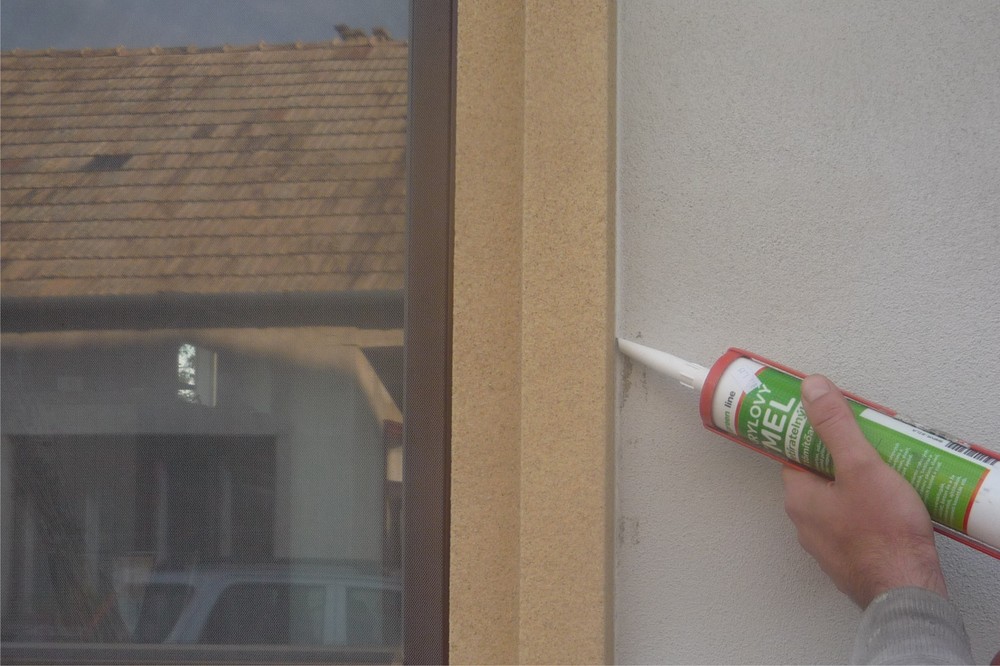
8. Apply the spackle to the potential rifts |
|
|
| 9. Apply penetrating sealer and then silicone paint |
|